January 25, 2013

Jewelry Organization on the Cheap

I love jewelry. Some ladies have power suits; I have power necklaces. It is very rare that you'll ever see me without at least earrings on, and if I'm at the office, you can guarantee I'll be sporting a necklace & earrings. (I love bracelets, too, but I can't wear them when I'm treating patients.)

I have collected a fair amount of jewelry over the years. No need to call hoarders, by any means, but in my tiny, organizationally challenged home, it was getting a bit difficult to manage. For years, I've had my necklaces thrown stored in a box on a shelf, and my earrings & bracelets tossed into a desk drawer along with my makeup & hair accessories. It was getting difficult to find things, and when I tried to grab one necklace, there were always at least six others tangled up with it. The earring situation was getting out of hand, too. I tried to organize the drawer by puuting my earrings into some jewelry boxes i got for free, but, it was still a mess, and I kept forgetting which box a pair of earrings might be in. It was getting so bad that I wasn't even bothering to put my earrings away. Just left them on the desk in a pile.


I finally got fed up with it. But a typical jewelry organizer wasn't going to work. The jewelry boxes that sit on a shelf never hold enough jewelry pieces for me, and I don't have the funds or the space for the big wall or freestanding organizers. Craftiness Activate!


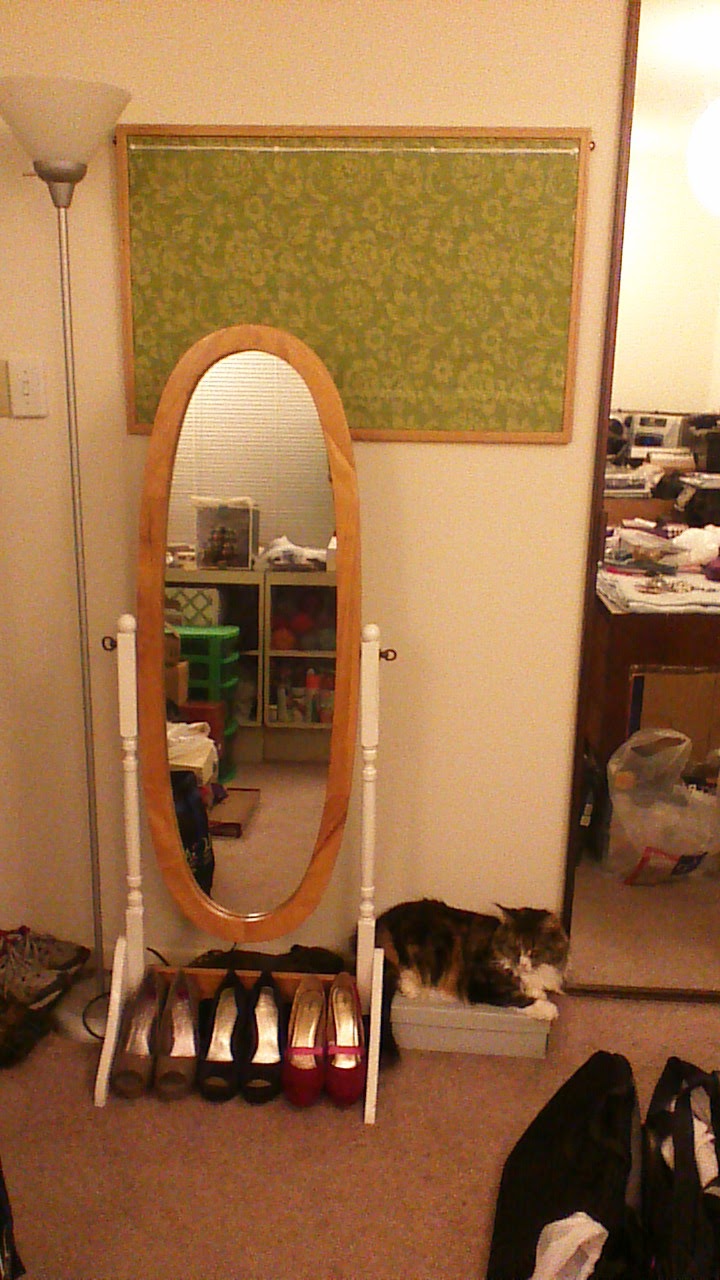
I grabbed my old bulletin board from high school, and covered it with some canvas I had in my stash. I turned under the edges of the fabric & just stapled it to the cork. A spare piece of ribbon got thumbtacked across the top to hang earrings off of. Nearly all of my earrings are on fish hook type wires. More thumbtacks went in to hang necklaces & bracelets off of.

"Why did you hang it so high? I can't bat at any of that!"


Boom, done! Completed in an evening, absolutely free, & takes up no space in the apartment. All my jewelry is now easy to find. For my sets, I keep the earrings just above it's matching necklace. Added bonus: with all the necklaces hanging from the same level, I can quickly tell which ones are longer/shorter than others, which makes the trying on of necklaces when I get ready in the morning much faster! If I try to pair a necklace with a shirt, but the necklace is too long, I can quickly tell which other, shorter necklaces are better contenders. And now I'm much less likely to throw all my jewelry in a pile on the desk again!

Today: phone meeting with the business coach (cringe), run stats for the office, make a housewarming gift to give to a friend tomorrow night, & chillax with the much-neglected-of-late husband.

TGIF!

January 23, 2013

Tatting & a video tutorial!

I've still been plugging away at tasks to get done at work & in craft-land. In the latter category, I mentioned before that I'm working on Jane Eborall's TIAS. http://tatitandsee.blogspot.com/2013/01/introduction-to-tias-2013.html I'm liking this project. It's in bite sized pieces, which keeps me from completely ignoring all the other things I need to get done (we have to wait a few days between the release of each piece of the pattern). This project is also teaching me some new techniques.

Here's my progress so far:

Day 1
Just basic rings & chains. Working with size 10 crochet cotton.

Day 2
In this section, I got to learn how to do a split chain. The interwebs were surprisingly lacking in tutorials for needle tatting such a thing. I found this video & tried it, but didn't care for the results. The sideways ring bothered me & my mild OCD. I ended up doing the split chain the same way as a shuttle tatter would, and like the results much better.

Day 3
Nothing new. Just a continuation of the split chain to climb up to the next row, which is a ring & chain shorter than the previous.

Day 4
Adventure Time! This section involved creating an outline using Catherine Wheel joins. The internet produced absolutely zero tutorials for how to do this type of join with tatting needles. It seemed to be a shuttle-only technique. I tried to substitute other types of joins, but nothing produced the nice, neat, smooth edge I was seeing in other people's pictures. So I tinkered & figured out a way to make a Catherine Wheel join happen for needle tatters. And then I used my shiny new tablet to make my very first video tutorial! Woot! I almost feel techy! Head on over to my YouTube channel to watch the tutorial. (With a special appearance by the ever-adventurous Tali-cat!) If you have any questions, feel free to ask me there or here on the blog.
I'm still not sure what the TIAS project will be, in the end. That's part of the fun! There will be something like 11 parts to the pattern, so we're not quite halfway there yet. My guesses so far: a basket, or a hat. We'll see!

Well, that's enough adventure for this morning & I'm out of time. Happy Wednesday!